In this article we will show the process to deploy a simple Kubernetes cluster on Azure using Kubespray and Azure Resource Group Templates. All commands will be running using Azure CLI via the Azure Cloud Shell. For a primer on using Azure CLI have a look at our other article – Azure CLI Primer – Azure Cloud Shell .
Firstly we will need our resource group that our Kubernetes cluster will sit in:
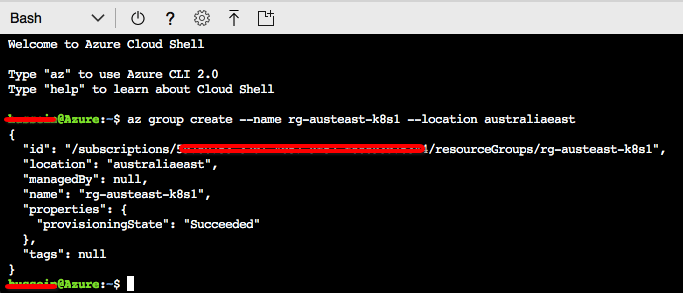
az group create --name rg-austeast-k8s1 --location australiaeast
Above awe created a resource group named rg-austeast-k8s1 in location australiaeast:
To deploy our Kubernetes cluster, we will use Kubespray. It is available on GitHub and provides a mechanism to deploy a production ready Kubernetes cluster using Ansible. We will create a directory for this Kubernetes deployment and clone the GitHub repository as follows:
mkdir k8s && cd k8s
git clone https://github.com/kubernetes-incubator/kubespray.git
cd kubespray/
pip install --user netaddr
pip install --user jinja2
pip install --user ansible==2.4.3
# Run the below line if you are using Python 3.x
find ./ -type f -exec sed -i 's/.iteritems/.items/g' {} \;
cd contrib/azurerm
Above we cloned the Kubespray GitHub repository, installed the required python packages to support our Kubespray deployment and installed a custom version of Ansible as the built-in version of Azure Cloud Shell will not allow us to use our modules needed to run our playbooks (hence why we used “–user” during pip install which dumps the module into our home directory “.local”). Also note the above find and replace command is needed to work with the version of Python we are using (3.x).
Next we will prepare our Azure Resource group with the requirements for our Kubernetes cluster including cluster name, VNET, SSH Key, number of masters/minions etc. To do this, we will edit the file within the current directory called group_vars/all.yml. The main values we will edit are:
- cluster_name: set it to k8s_cluster
- use_bastion: set this to true. As this is exercise is just to experiment with Kubernetes, we chose this option. It will give us a bastion host that we can use to access the cluster
- number_of_k8s_masters: set this to 1. Increase as you see fit
- number_of_k8s_nodes: set this to 2. Increase as you see fit
- admin_username and admin_password: set this to what you desire, this is the account we will use to log on and administer the cluster
- ssh_public_key: you should obviously use your own public key here otherwise you won’t be able to access the environment or run future Ansible playbooks
Below we outline the contents of the file:
[group_vars/all]
# set the cluster name. It must be between 3 and 24 characters in length and use numbers and lower-case letters only.
cluster_name: k8scluster

# Set this to true if you do not want to have public IPs for your masters and minions. This will provision a bastion
# node that can be used to access the masters and minions
use_bastion: true

number_of_k8s_masters: 1
number_of_k8s_nodes: 2

masters_vm_size: Standard_A2
masters_os_disk_size: 100

minions_vm_size: Standard_A2
minions_os_disk_size: 100

admin_username: devops
admin_password: devops

# MAKE SURE TO CHANGE THIS TO YOUR PUBLIC KEY to access your azure machines
ssh_public_key: "ssh-rsa AAAAB3NzaC1yc2EAAAADAQABAAABAQDLRzcxbsFDdEibiyXCSdIFh7bKbXso1NqlKjEyPTptf3aBXHEhVil0lJRjGpTlpfTy7PHvXFbXIOCdv9tOmeH1uxWDDeZawgPFV6VSZ1QneCL+8bxzhjiCn8133wBSPZkN8rbFKd9eEUUBfx8ipCblYblF9FcidylwtMt5TeEmXk8yRVkPiCuEYuDplhc2H0f4PsK3pFb5aDVdaDT3VeIypnOQZZoUxHWqm6ThyHrzLJd3SrZf+RROFWW1uInIDf/SZlXojczUYoffxgT1lERfOJCHJXsqbZWugbxQBwqsVsX59+KPxFFo6nV88h3UQr63wbFx52/MXkX4WrCkAHzN ablock-vwfs@dell-lappy"

# Disable using ssh using password. Change it to false to allow to connect to ssh by password
disablePasswordAuthentication: true

# Azure CIDRs
azure_vnet_cidr: 10.0.0.0/8
azure_admin_cidr: 10.241.2.0/24
azure_masters_cidr: 10.0.4.0/24
azure_minions_cidr: 10.240.0.0/16

# Azure loadbalancer port to use to access your cluster
kube_apiserver_port: 6443

# Azure Netwoking and storage naming to use with inventory/all.yml
#azure_virtual_network_name: KubeVNET
#azure_subnet_admin_name: ad-subnet
#azure_subnet_masters_name: master-subnet
#azure_subnet_minions_name: minion-subnet
#azure_route_table_name: routetable
#azure_security_group_name: secgroup

# Storage types available are: "Standard_LRS","Premium_LRS"
#azure_storage_account_type: Standard_LRS
Next we need to save this file and apply the template to create the resource groups. Execute the following script:
./apply-rg_2.sh rg-austeast-k8s1
The above script will deploy all the requirements for our Kubernetes cluster using Ansible. The script will initially:
- Run an sensible playbook to generate the Resource group Template JSON files
- Create each deployment based on the related JSON file
The templates called will instantiate the VNET’s, Public IPs, storage accounts, subnets, NSG’s, availability sets, virtual machines and the underlying deployments that will host our Kubernetes cluster based on the specification defined in our YAML file above. It is important you choose the exact script above with “_2” in the name as we are using Azure CLI 2.0.
You will see the Ansible playbook output executing the required tasks. Once completed successfully, we can see our resources created within our resource group:
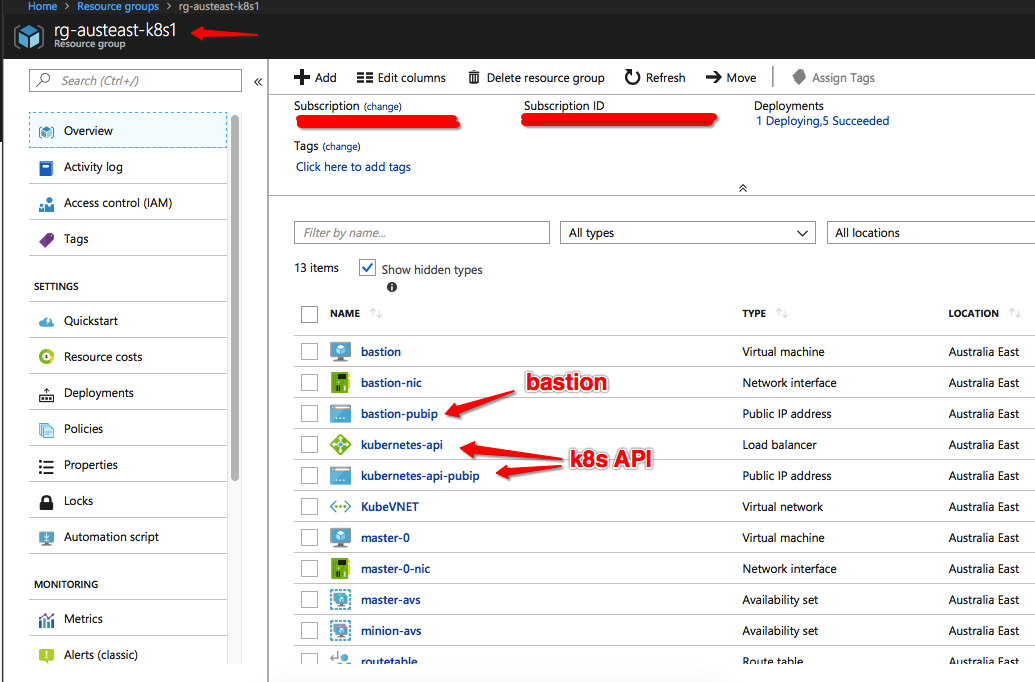 You will see we now have the following external interface (or public IP endpoint) for:
- Public IP of the bastion
- Public IP of the Kubernetes API which is also backed by a load balancer that was created as part of the script above
At this stage we still do not have Kubernetes running, we simply deployed the pre-requisites to be able to run up our cluster. Let’s create our inventory file:
./generate-inventory.sh rg-austeast-k8s1
This will create an inventory file in the current contrib/azurerm directory. Next, we need to tweak the inventory file to ensure it has reference to our devops user and SSH private key file. Edit the inventory file and ensure it references the devops username and kubespray PEM file:
[contrib/azurerm/inventory]
bastion ansible_ssh_host=[EXTERNAL IP HIDDEN] ip=[INTERNAL IP HIDEN] ansible_host=[EXTERNALIP HIDDEN] ansible_user=devops
master-0 ansible_ssh_host=[INTERNAL IP HIDEN] ansible_user=devops ansible_ssh_private_key_file=~/.ssh/kubespray.pem
minion-0 ansible_ssh_host=[INTERNAL IP HIDEN] ansible_user=devops ansible_ssh_private_key_file=~/.ssh/kubespray.pem
minion-1 ansible_ssh_host=[INTERNAL IP HIDEN] ansible_user=devops ansible_ssh_private_key_file=~/.ssh/kubespray.pem
We are now ready to deploy the Kubernetes cluster using the kubespray Ansible playbook. Before we do so, ensure we have the private key saved in ~/.ssh/kubespray.pem. Now run the following to deploy the cluster using the Kubespray Ansible playbook:
./generate-inventory.sh rg-austeast-k8s1
cd ../../
/home/[username]/.local/bin/ansible-playbookansible-playbook -i contrib/azurerm/inventory -vvvv -u devops --become -e "@inventory/sample/group_vars/all.yml" cluster.yml
Note, [username] above is your username from within the Azure Cloud Shell.
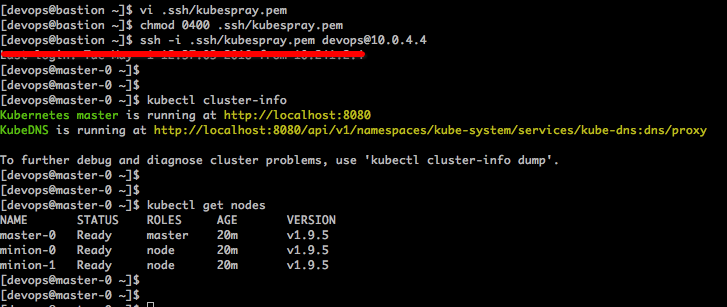
Again, you will see the output form running the Ansible playbook that will deploy the Kubernetes cluster. Once we have finished running the Ansible playbook, we can log into our bastion host and jump on to the Kubernetes master using our SSH private key. Your Kubernetes cluster should now be up and running. Let’s run “kubectl cluster-info” and “kubectl get nodes” to see that we have successfully started the cluster with the required minions/nodes and the master:
Stay tuned for the guide on managing Kubernetes to Automate CI/CD pipeline and deploy web apps on the fly…